Products
Thank you! Your submission has been received!
Oops! Something went wrong while submitting the form.
XX products
Tag
Close Filters
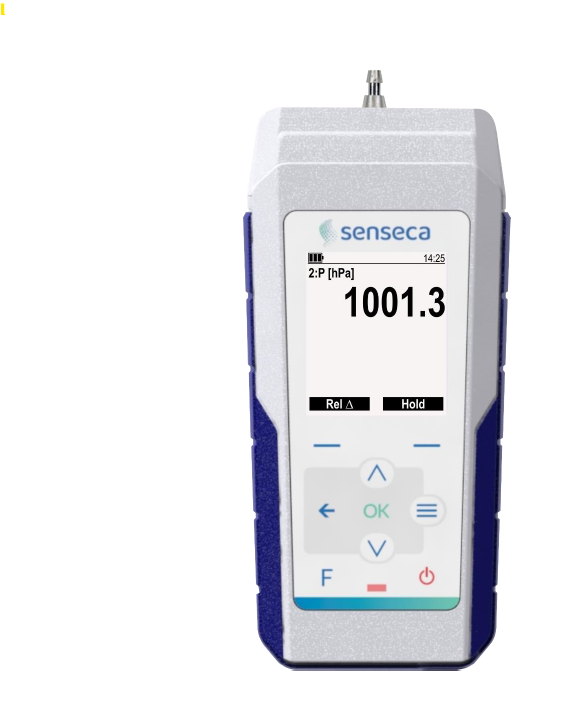
PRO 211 and PRO 215 are high-performance handheld absolute pressure meters, built for durability, ease of use, and reliability. PRO 245 additionally features data logging.
View

Pressure
Professional Absolute Pressure Meter
PRO 241-2 | PRO 245-2
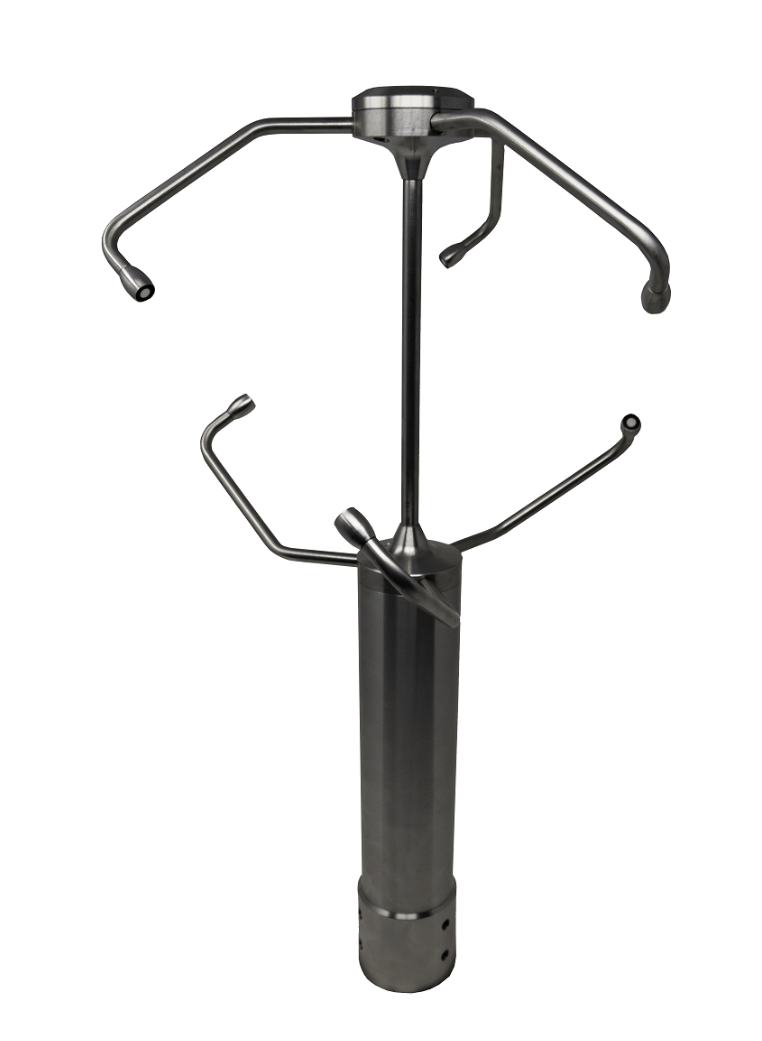
Mechanical flow switch, for fluid media, with spring-supported piston and magnetic triggering of a reed switch. Robust construction in brass or stainless steel.
View

Flow Switch
MR1K Piston Flow Switch 0.4 to 60 L/min
MR1K...
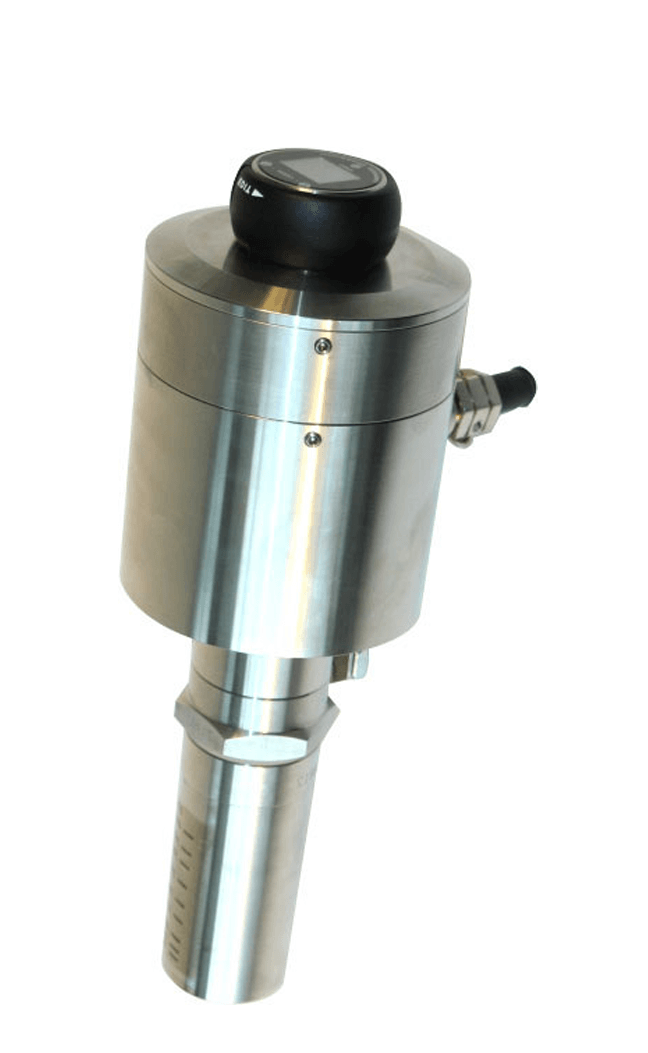
Conductive fluid (working fluid) in a pipe moves at a right-angle transverse to the magnetic field emanating from the flow meter which induces a voltage that is directly proportional the local fluid velocity.
View
Flow Meter
Magnetic Inductive Flow Meter for Conductive Fluids
FIS | OMNI-FIS
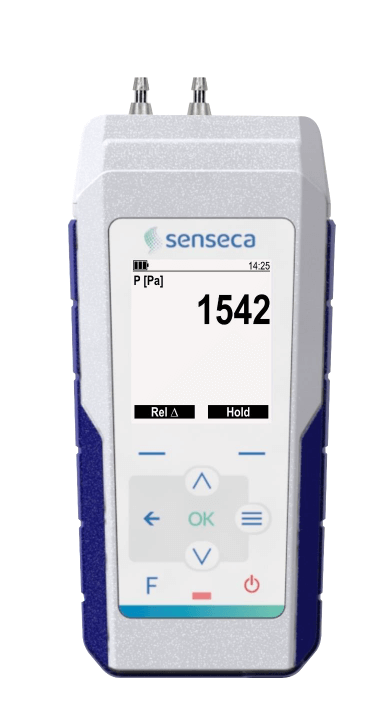
PRO 211 and PRO 215 are high-performance handheld differential pressure meters, built for durability, ease of use, and reliability. PRO 215 additionally features data logging.
View
Pressure
Professional Differential Pressure Meter
PRO 211-X | PRO 215-X
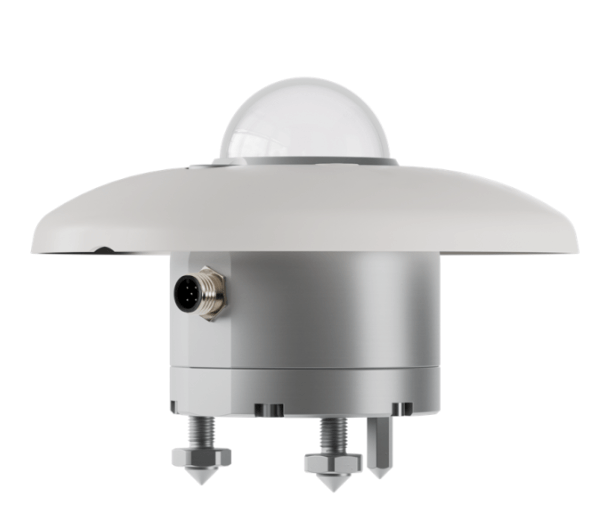
Top Level, Fast response, spectrally flat, Class A Pyranometer that meets the strict standards of ISO 9060:2018
View
Pyranometers
Class A Fast Response Pyranometer
PYRAsense - LPR10M0T
Robust dual channel professional grade handheld
meters for thermocouple probes.
View
Temperature
2-Channel Thermocouple Meter / Data Logger
PRO131.2 | PRO 135.2 (Data Logging
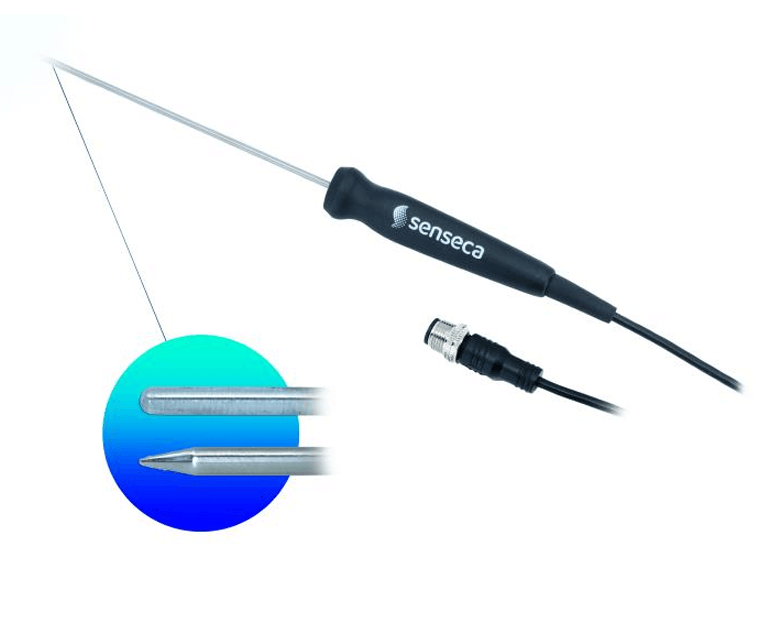
AX 111 are precision analog Pt100 temperature probes based on thin film sensor technology.
AX 115 are high precision analog immersion probes incorporating wire wound Pt100 sensors for best precision.
View
Temperature
Pt100 Precision 4-wire Probes
AX 111 | AX 115
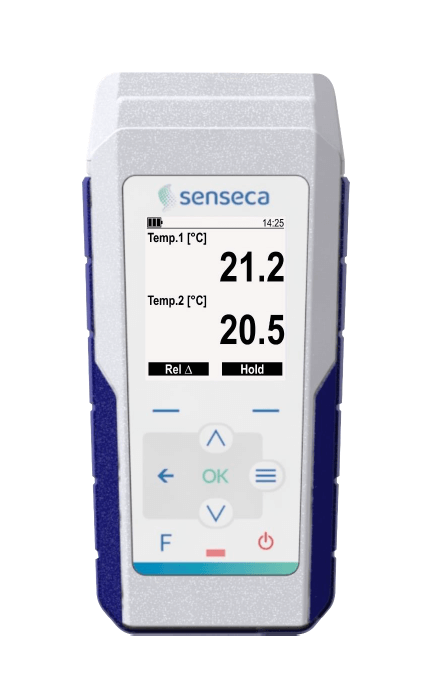
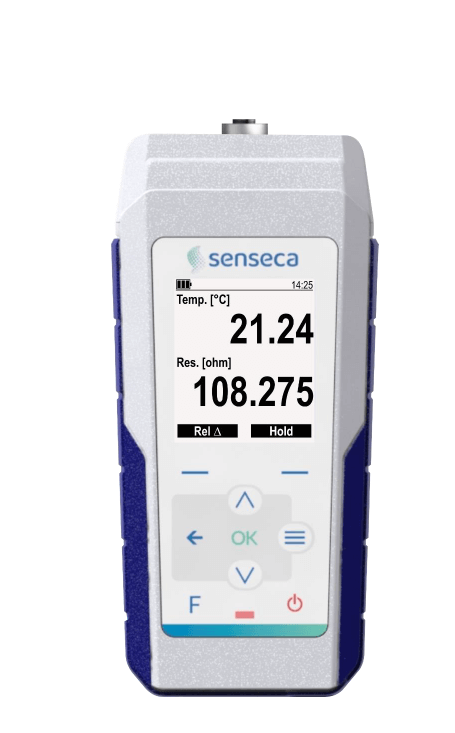
PRO 111 and PRO 115 are high class professional handheld meters for 4-wire Pt100 probes with a rich set of features, high grade robustness and operating comfort for safe and reliable use.
PRO 115 also has data logging capability.
View
Temperature
Professional Pt100 4-wire high precision thermometer
PRO 111 | PRO 115
2 or 4 input data logger covering universal analog or digital inputs.
View
.png)
Multiparameter Data Logger
Analog / Digital Data logger with color touch screen
CMC-N16
AISI-316L Stainless Steel fixed switch point level switch with armored cable. RINA Naval and Exia Atex Certified
View

Level Switch
Stainless Steel Simple Bilge Level Switch
SIMPLE BILGE
Environmental temperature, relative humidity and, optionally, barometric pressure transmitter with standard RS485 Modbus-RTU / Analog output.
View

Temperature
Temperature, Relative Humidity & Barometric Pressure Transmitter
ENVIROsense
High-speed isolator provides signal output which is isolated between input, output and power-supply.
View

Isolator
High Speed Response Isolator
WSPF-DE
Compact plug-in type converter provides 2 signal outputs which are mutually isolated between input, output and power-supply. It amplifies and converts various kinds of signal with isolation.
View
Isolator
Dual Output Isolator
WSPF-DSW
This expanded range compact plug-in type converter provides signal output which is mutually isolated between input, output and power-supply.
View
Isolator
Advanced DC Voltage / Current Isolator
WSPF-DS
DC voltage or current isolator amplifies and converts with signal isolation, highly effective countermeasure to signal noise
View
Isolator
Basic DC Current / Voltage Isolator
WSPF-IS
Maximize data accuracy with the new Spectrally Flat Class A albedometer
View
Light / Radiation
Spectrally Flat Class A Albedometer
LPS110P0
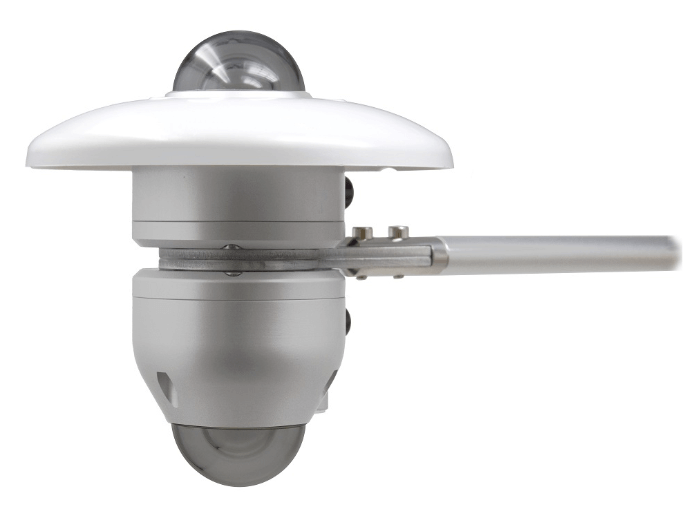
2-axis ultrasonic static anemometer - high sensitivity to detect very low speeds. Measurement of wind direction, wind speed and wind gust.
View

Air Speed
High Sensitivity Anemometer for Very Low Wind Speeds
HD53LS
Robust AISI 316 stainless steel low profile 3-Axial ultrasonic anemometer with integrated heating and barometric pressure sensor.
View
Air Speed
AEOLUS-3 Axis Ultrasonic Anemometer
WUS30FA / WUS30FW / WUS30FX / WUS30FY
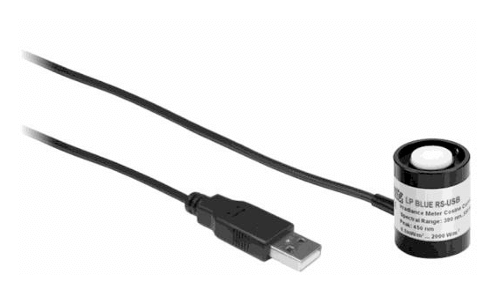
The radiometric probe LP BLUE RS-USB measures the irradiance (W/m2) in the spectral range of Blue light.
View
Light / Radiation
Probe for Measuring Blue light with USB Output
LP BLUE RS-USB
Personnel monitor, 0 to 1,000ppm carbon monoxide with integrated audible alarms.
View
.png)
Gas Monitors
Portable Carbon Monoxide Meter with Alarm
GCO100
Extremely high resolution professional manometers.
View

Pressure
Handheld Fine Manometer / Manometer
ECO 210-3 | ECO 210-5
J, K, or S type thermocouple input, scalable voltage or current output 0/2 to 10V or 0/4 to 20mA
View
.png)
Temperature
Thermocouple Transmitter Type J, K , S
TC500
Measures sunshine duration that exceeds the WMO-defined threshold of 120 W/m² and direct solar radiation 0 -2,000 W/m²
View
.png)
Light / Radiation
Sunshine Duration Sensor
LPSD18.1 / LPSD18.2 / LPSD18.3
Waterproof, high 0.01°C resolution, 1.1mm diameter probe, high precision calibration at 37°C as reference for medical devices in the field of IVF.
View
.png)
Temperature
High Precision Reference Thermometer with Micro-Probe
G1781
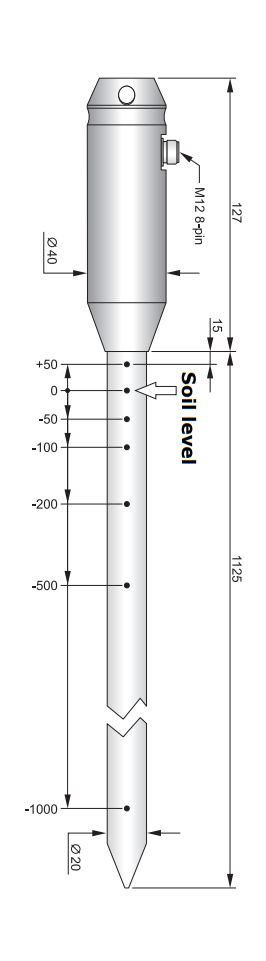
Thermal profile temperature probe designed in accordance with the WMO for agriculture and geothermic studies, 7 discreet depths of measurement via pt100 sensors.
View
Temperature
Muli-Depth Soil Temperature Probe
TP32MTT.03 / TP32MTT.03.1
Pack of (4) 20cm wide chart paper x 15m long for Ross Chart Recorders model 201 and 202.
View
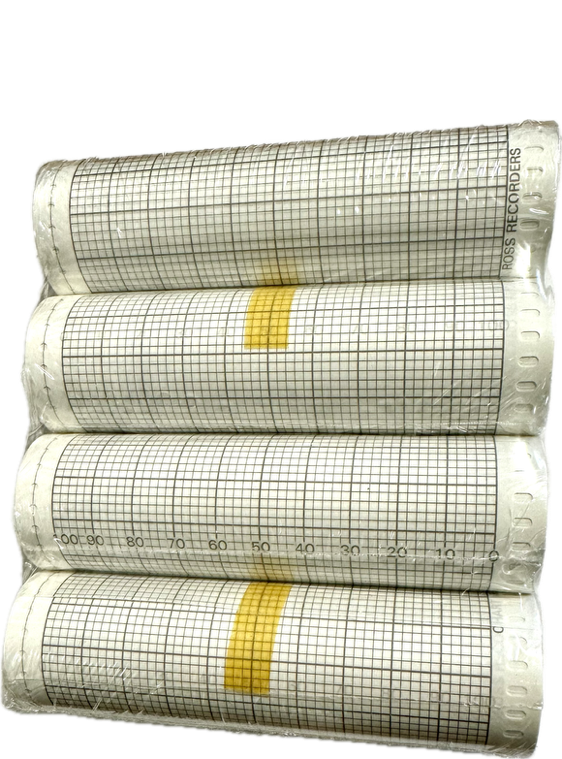
Chart Recorders
20cm Chart Recorder Paper
1201
Pack of (4) 10cm wide chart paper x 15m long for Ross Chart Recorders model 101 and 102.
View
Chart Recorders
10cm Chart Recorder Paper
1101
Non-glass Electrochemistry probe for pH, ORP, and conductivity. The probes are based on ISFET technology, and come Bluetooth enabled.
These are replacement probes for the wireless module (not included).
View
PH Measurement
Replacement Probes: Combined pH, ORP, Conductivity, and Temperature probe.
3380-205 | 2370-205
Non-glass Electrochemistry probe for pH, ORP, and conductivity. The probes are based on ISFET technology, and come Bluetooth enabled.
View
PH Measurement
Solid State Combined pH, ORP, Conductivity, and Temperature probe.
3380-205 | 2370-205
Non-glass pH probes based on ISFET technology, Bluetooth enabled. Includes a wireless ISFET probe of your choosing, rugged carry case, tablet with rugged case, screen protector, stand, and initial buffer set.
View
PH Measurement
Agriculture Package: Wireless ISFET pH Kit
Agriculture Kit
Non-glass pH probes based on ISFET technology, Bluetooth enabled. Includes a wireless ISFET probe of your choosing, rugged carry case, tablet with screen protector and stand, and initial buffer set.
View
PH Measurement
Industrial Package: Wireless ISFET pH Kit
Industrial Kit
Non-glass pH probes based on ISFET technology, bluetooth enabled. Includes a wireless ISFET probe of your choosing, tablet with screen protector and stand, and initial buffer set.
View
PH Measurement
Laboratory Package: Wireless ISFET pH Kit
Lab Kit
Replacement Non-glass pH probes for use with the Bluetooth module.
View
PH Measurement
Replacement Wireless ISFET pH probes
Wireless Replacement Probes
Non-glass pH probes based on ISFET technology, bluetooth enabled.
View
PH Measurement
ISFET pH Module+Probes
3380-100 | 3320-100 | 2370-100 | 9370-100
The G 1690 is precision gas meter, common applications are diving gas and other protective gas measurements.
View

Oxygen Analyzer
Compact Oxygen Analyzer
G1690

